


Overview
Floe allows emails to be built using a combination of Floe menu options in SAPGUI and the Floe Designer Fiori app.
The Floe Designer app enables Business Users to manage email content. Technical development within the Floe backend menu will still be required by a developer.
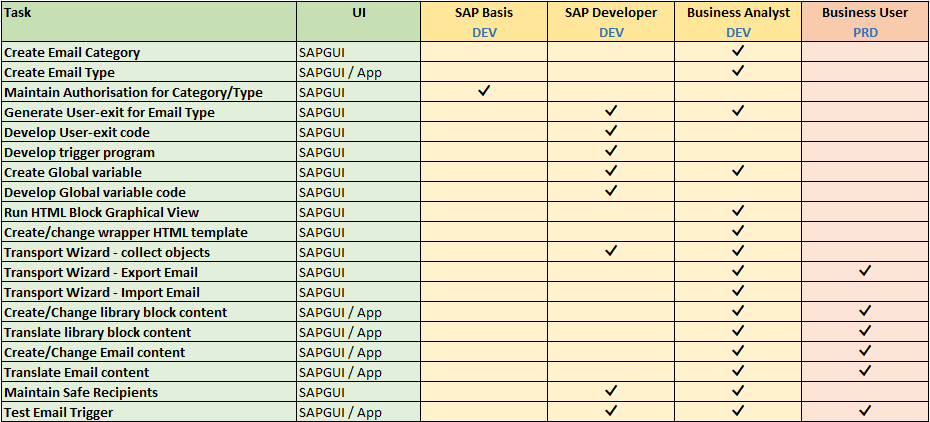
We identify 3 roles for defining and building emails with Floe with each role having a specific responsibility.

Role responsibilities
Steps to setting up an email using Email Builder

Floe Designer User Guide
Manage Emails
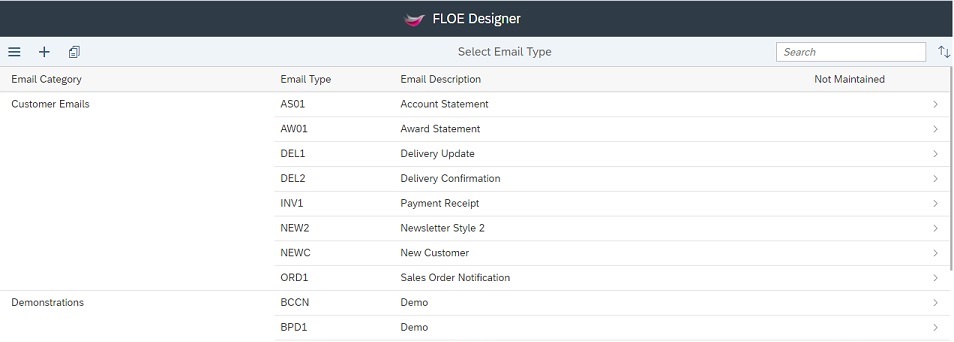
The first page presented to a user is usually the "Manage Emails" page. Here users can see a list of email types for which they have "Maintain" authorization grouped under their respective categories. Email categories must be created in the backend in the following IMG transaction: Floe->Maintain Email Types.
Selecting/clicking on an email type will launch the "Edit Email" page for the type selected. The following actions are also available in the header bar (from left to right):
- Navigate: This button is present in every page and allows users to navigate from one page to another
- Create new email type: Users with "Extended Maintenance" authorization can use this button to create a new email type. They must then select a category and a four-character code and description for the email type. An SMS toggle allows the email to be sent as an SMS and requires Rendio.io to be setup to use the functionality. Once the email type is created it will appear in the main list with an icon to indicate that no content has been maintained yet.
- Copy email type: Alternatively, users can create a new email type based on an existing one. A copy of the original email type will be created under a new code/category. Users can then maintain this new email type (the original one will remain unchanged). This button will also only be available to users with "Extended Maintenance" authorization. Please also note that the email type class will not be copied and must be maintained in the back-end.
- Filter/Search
- Sort
Edit Email
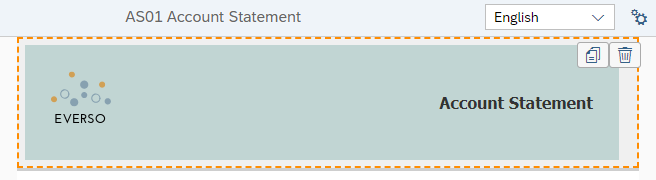
Selecting/clicking on an email type will launch the "Edit Email" page for the type selected. Here users can maintain their email content.
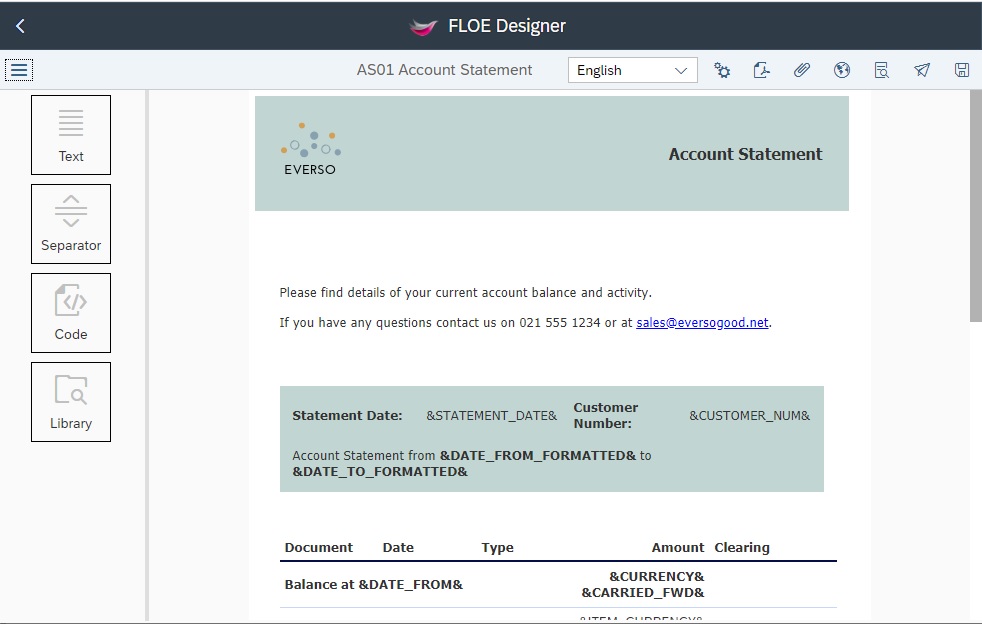
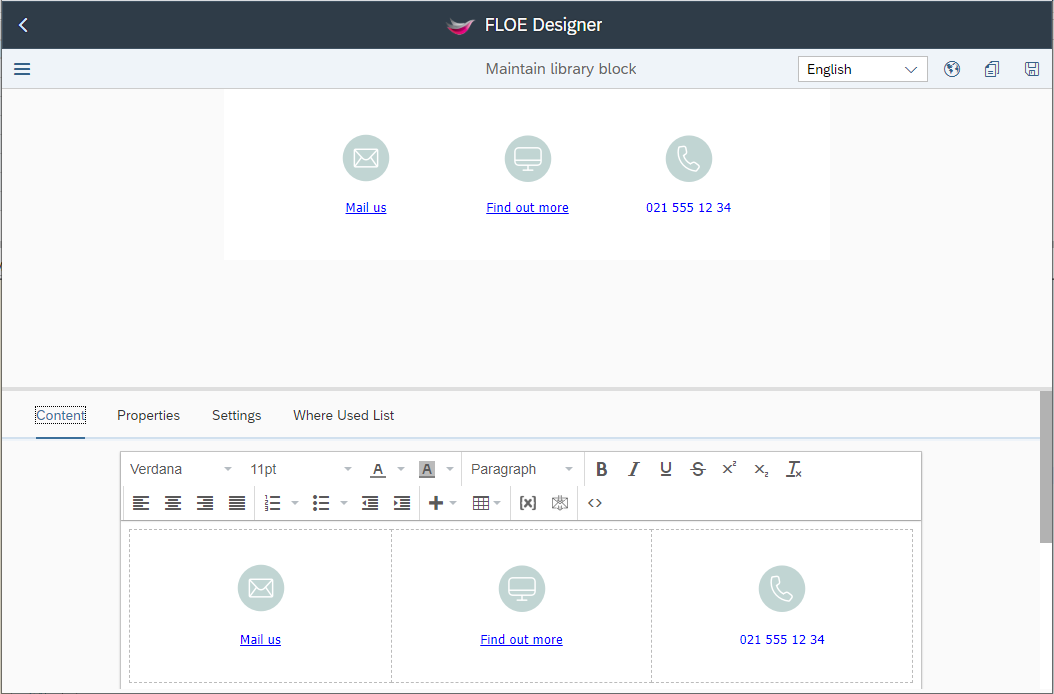
Content is separated into fragments called blocks, each with their own set of properties. New blocks can be added to the email by dragging one of the block types from the left and dropping to the required area. There are four different block types:
Text: This is the most commonly used block type. Blocks of this type are maintained via a rich text editor.
Separator: These blocks consist of a horizontal line. There is therefore no content to maintain although there are a number of properties.
Code: In rare occasions, users may need to directly add an html fragment to their emails. These blocks are maintained via an html editor.
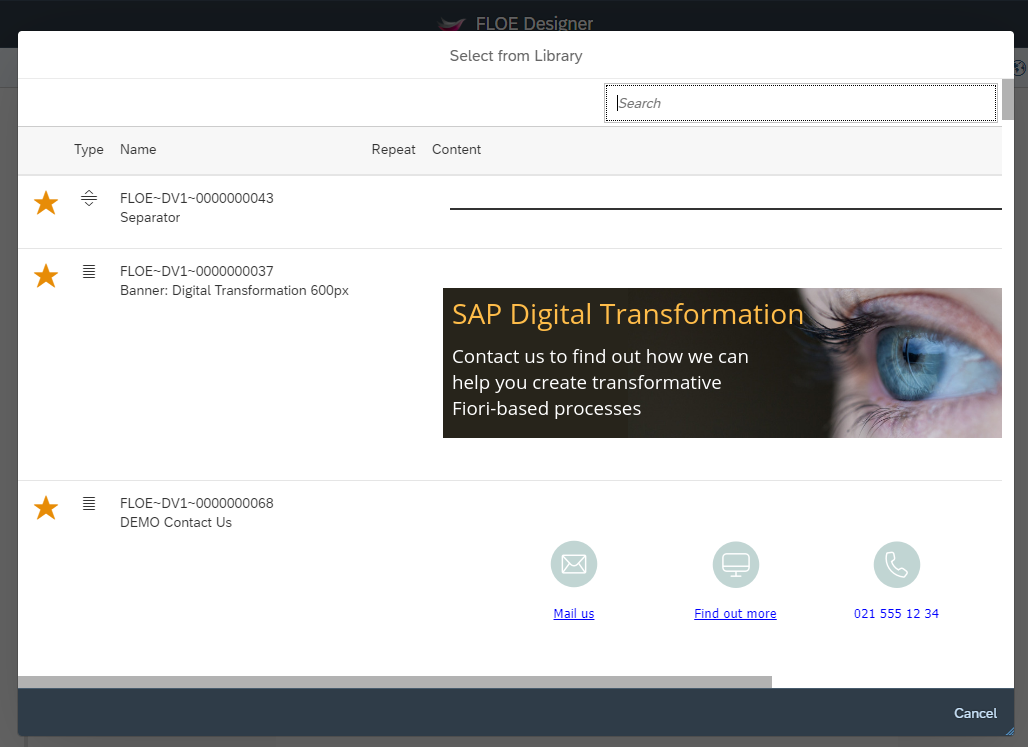
Library: Blocks of any of the three types mentioned above that may be re-used in different email types can be added to the library (see below for details on managing the library). When the library type is dropped onto the content area, the user is presented with the list of library blocks to choose from. Selecting a block from the list will add it to the email content.
Drag one of the block types from the left and drop it onto the Drop new content here area to add the first new block to the email. Drag and drop additional blocks on a blue divider line which shows the location of the new block.
Re-arrange the sequence of blocks in the email by dragging/dropping them onto a divider line. Hover over a block, and click on the icon to delete or copy it (in which case a new block will be created and added to the email).
Click on a content block to select and edit. The editor area appears in the bottom half of the screen (the area is resizable):
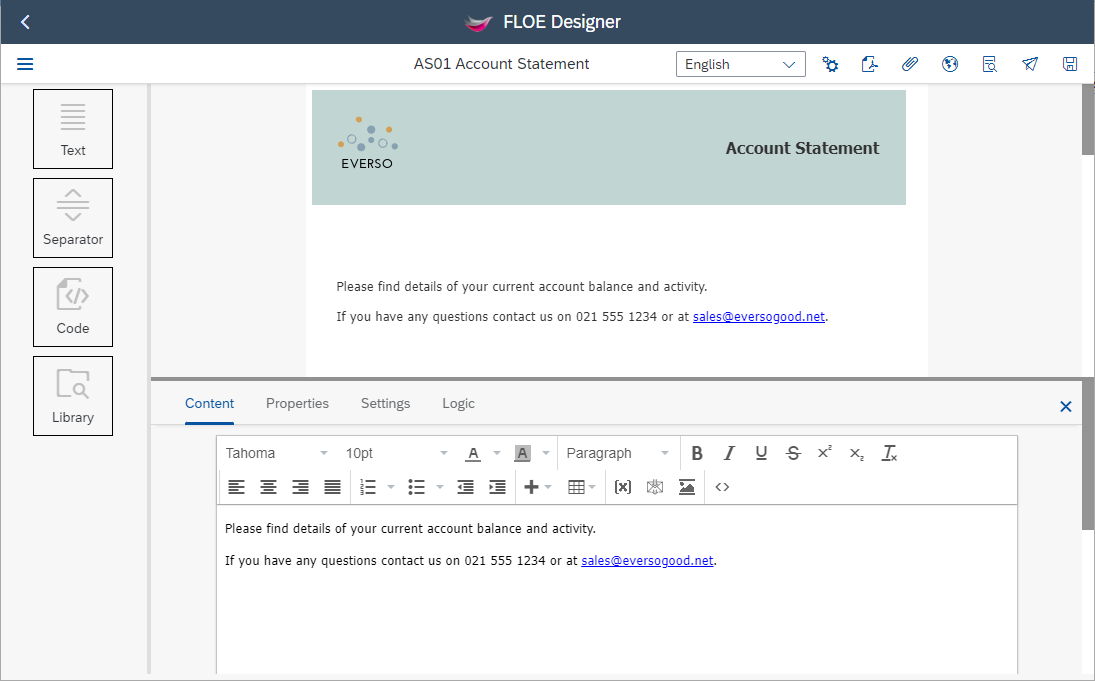
Text blocks: The content tab contains a rich text editor
Separator blocks: There is no content tab
Code blocks: The content tab contains an html editor. There is no Properties tab
Library blocks: There is no content tab (as the content is not editable) and the properties and settings are displayed but are not editable
Rich Text Editor
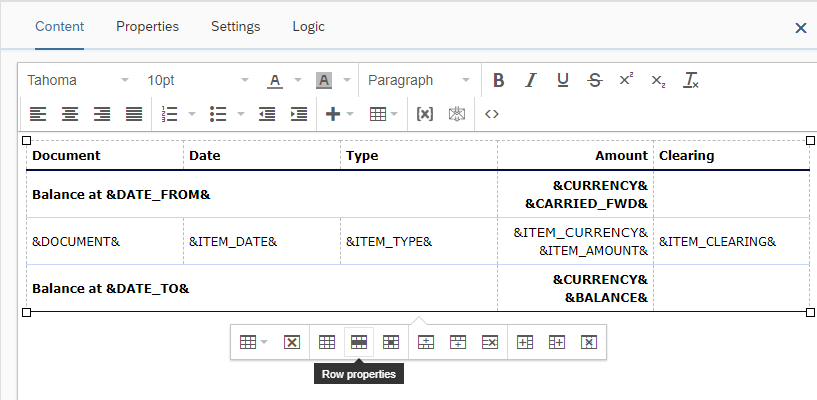
The Rich Text editor can be used to add and format text, images, tables and links.
Variables to be substituted when the email is sent (more information on using variables in Floe can be found here) can be added either manually by surrounding the variable name with ampersands (e.g. &VARIABLE1&) or by clicking on the "Add variable" button in the rich text editor toolbar. This will present the user with a dialog containing global and email type variables to choose from.
Entire blocks can be nested inside other blocks by adding a block id surrounded by # (e.g. #<BLOCK_ID>) to the content. These blocks will be substituted at runtime and will not be visible in the preview area.
Inbound email links/buttons (more information on Inbound Email processing can be found here) can be added by the "Add inbound email link" button.
Images can be uploaded to the image repository and added to the email content by clicking on the "Image Repository" button.
The "Source code" button presents the user with the html generated by the editor so it can be edited directly.
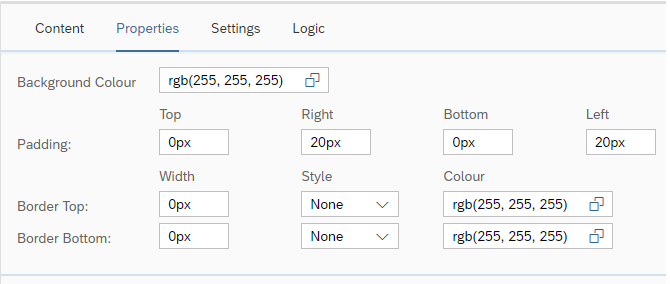
Properties
Click the "Properties" tab to change the look and feel of the block inside the email. Properties available to change are shown below:
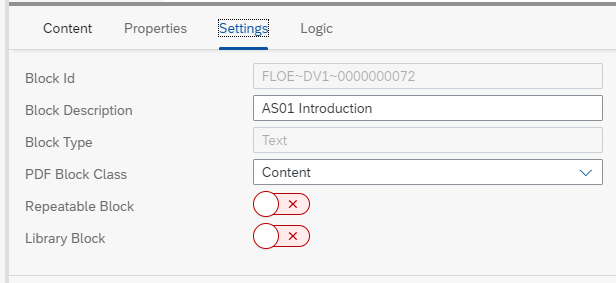
Settings
Click the "Settings" tab to view the block meta-data.
Toggle the Repeatable Block to make the block "Repeatable" (see the "Repeating content" section below).
Toggle the Library Block switch to add the block to the library. A block that is likely to be re-used in a different email can be added to the library. Library blocks cannot be edited in the "Edit Email" page - they must be edited in the "Edit Library Block" page (which requires "Extended Maintenance" authorization). If the "Library Block" switch is changed from "On" to "Off" the block will not be removed from the library. It will be removed from the email and an editable copy of the library block will be added in its place.
The "PDF Block Class" field is only used when the content is converted to PDF. It determines whether a particular block will be rendered as a header, content, or footer block. The difference is that headers (and footers) are repeated at the top (or bottom) of every page.
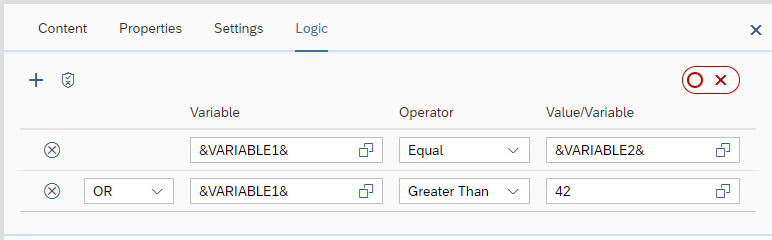
Logic
Click the "Logic" tab to enter conditions under which the block will be included in the email. If the specified condition evaluates to true at runtime, the block will be included otherwise it will not. If no conditions are entered the block will be included by default. Please note that blocks can also be added to/removed from emails in the HTML Block Determination User-Exit (the user-exit runs after the logic determined in the configuration is applied and can therefore overwrite it).
Variables can be added manually to the "Variable" and "Value/Variable" fields (which accept free text) or by using the field value-help and selecting a variable from the list. For more complex conditions, users can use the switch control on the right so that brackets are also made available.
Repeating content
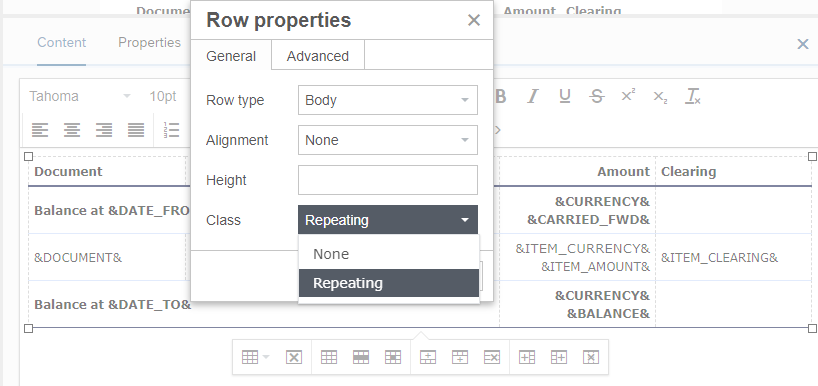
There are two ways to configure repeating content. The first is via the "Repeatable block" field in the Settings tab. If this is set to "On" then the content of the entire block may repeat in the email when it is sent. Whether it will do so however (and indeed how many times it does repeat) depends on whether the block contains a variable with more than one instance in the data (see the examples page for more information on repeating variables). In scenarios where it is desirable that only a certain section of the block repeats, the rich text editor table control can be used. Users may click inside a table row and select "Row properties" and then in the properties dialog, set the class to "Repeating". This will cause only certain table rows to repeat.
Floe supports up to two levels of nested repeating content. (e.g. a repeating section inside a repeating section).
Header bar
The following actions are available in the header bar (from left to right):

- Navigate to a different page
- Change language: If the email has been translated to multiple languages these will be available in the language dropdown. Here users can change the language being viewed/edited.
- Settings: These are specific to the email type - more information can be found here.
- PDF Settings: Customers with a Renda.io licence can convert content created by the Floe designer to pdf. These settings determine the look and feel of the pdf created based on the content of this email.
-
Attachments: Here, users can configure email attachments. The list of attachments will be passed into the attachment user exit and can be modified there. There are two types of attachments:
- Static attachments: these are files uploaded from a local drive to the attachment repository. Users must have the "Extended Maintenance" authorization to upload files although they may add files already uploaded to an email type with only "Maintain" authorization for that email type.
- Dynamic attachments: These are other floe email types. They will be added to the email as html attachments or they can be converted to pdf for customers with a Renda.io licence. The same data available to the original email will be available to the dynamic attachments when they are created.
- Translate will create a copy of all the email blocks under the selected language (only languages that are installed in the system will be available in the drop-down). Please note that the actual translation must be done manually. It is assumed that emails have the same number of blocks with the same properties, settings and logic in different languages. The only differences from one language to another are the block content and attachments which are also language independent and must be configured separately.
- Preview will show a preview of the email much like the one available in the topmost area of the "Edit Email" page. This preview is different from the "real preview" in the "Test Trigger" page which actually calls the floe API and has access to variable data.
- Test Trigger will launch the "Test Trigger" page for the currently selected email and language (see below for more information on the "Test Trigger" page)
- Save: Please note than when navigating to the "Edit Email" page, the page is refreshed with the data from the back-end. It is therefore important to "Save" before navigating away from the page.
Manage Library
Blocks can be added to the library (see above) so that they can be re-used in other emails. Users must have the "Extended Maintenance" authorization to navigate to and use the "Manage Library" page. The page displays the list of library blocks in the system:
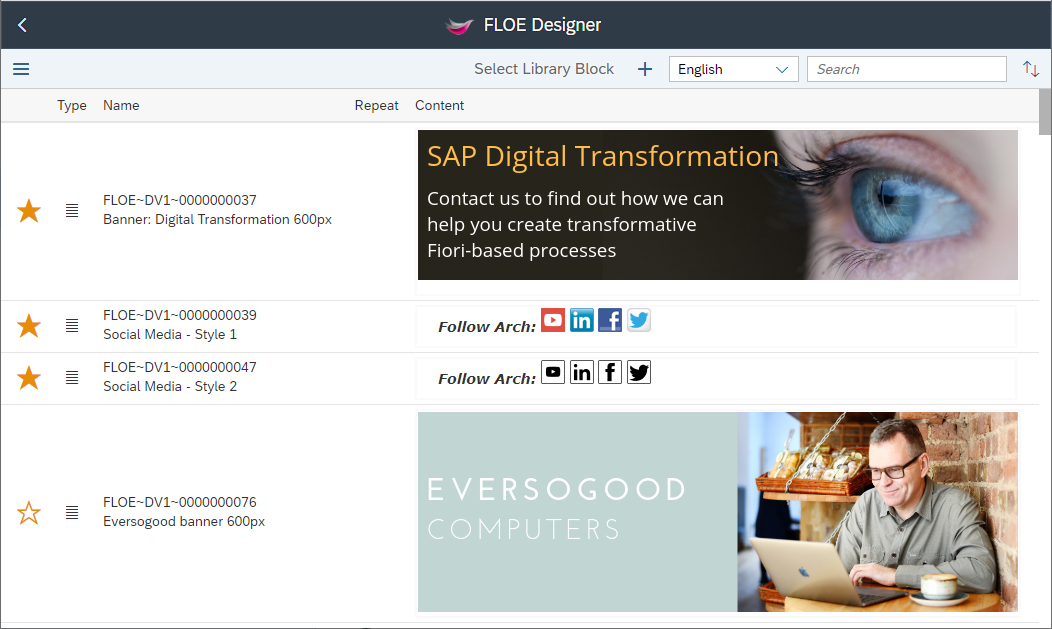
Click on a library block to launch the "Edit Library Block" page for the block selected. Click on the star icon in the first column to add/remove library blocks to/from the list of favourites. "Favourite" blocks will appear at the top of the list and become more easily accessible. The following actions are also available in the header bar (from left to right):
- Navigate to a different page
- Create new library block
- Change language: Only the library blocks maintained in a certain language are displayed at any one time. Here users can change the language being viewed/edited.
- Filter
- Sort
Edit Library Block
When a block is selected from the "Manage Library" page, the "Edit Library Block" page is launched. Here users can maintain the selected library block:
This page is very similar to the "Edit Email" page, with some differences: In the "Settings" tab users can toggle the "Favourite" setting for the block and there is no "Logic" tab as logic is configured on the email type level. The "Where Used List" tab will list of the email types this block is used in. The following actions are available in the header bar (from left to right):
- Navigate to a different page
- Change language to change the language being viewed/edited
- Translate to a new language
- Copy will create a new library block with the current one as basis
- Delete will only be available if the library block is not used in any email types
- Save
Test Trigger
Select the test trigger page to send a test email or preview the email in your browser. This preview is different than the preview in the "Edit Email" page as the html presented is generated by the Floe API which will run all the user-exits, perform variable substitution etc.
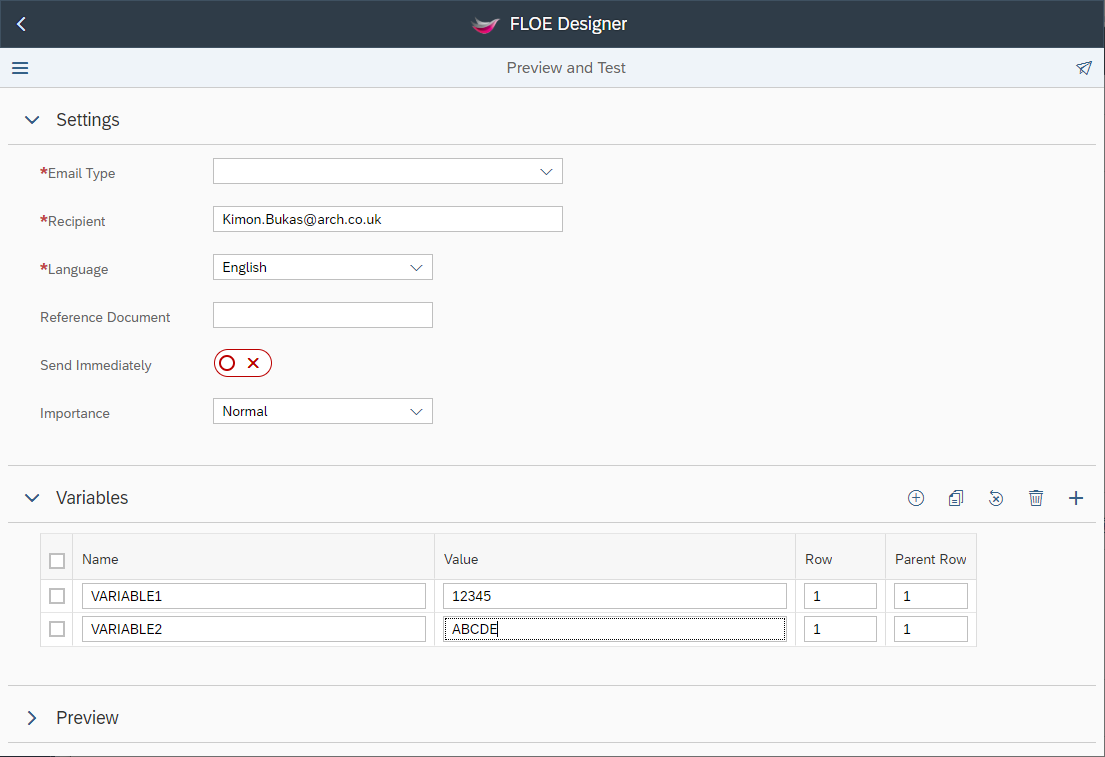
The fields in the "Settings" section are used to fill the import parameters of the Floe API. In the "Variables" section users can populate the IM_VARIABLES import parameter of the API and feed it variable data (the data user-exit and global variable routines will be called by the API so that data does not need to be fed). The "Row" and "Parent Row" fields are for repeating and nested-repeating variables and can be left blank otherwise. The following buttons are available in the "Variables" section:
- Auto-fill from content auto-fills the table with all the variables from the email content and logic.
- Copy to new row creates new instances of the selected variable(s) and allows users to create repeating and nested-repeating data faster.
- Clear all refreshes the variables table.
- Delete row
- Add row
Click on "Preview" to display the email content . Click the "Send email" button in the page header to send the email to the selected recipient.
Attachment Repository
In the attachment repository page, the files uploaded to the system are displayed. Users must have the "Extended Maintenance" authorization to navigate to and use the "Attachment Repository" page.
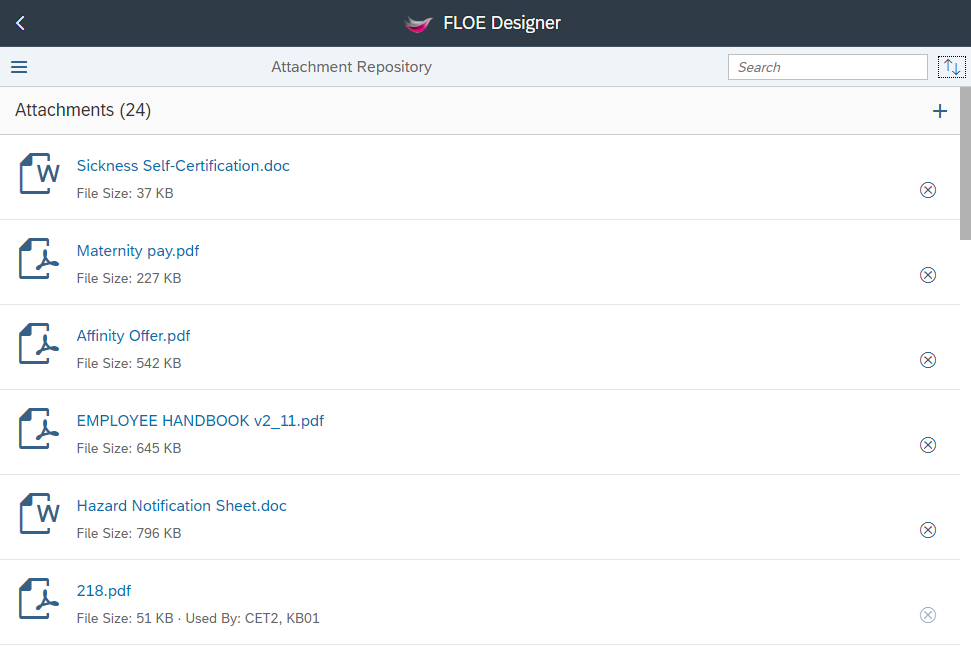
Users can download any of the files by clicking on the attachment name. New files can be uploaded by clicking on the "Upload" button in the top right corner. Files that are not used by (e.g. they have not been configured to be added to) emails can also be deleted from the repository.
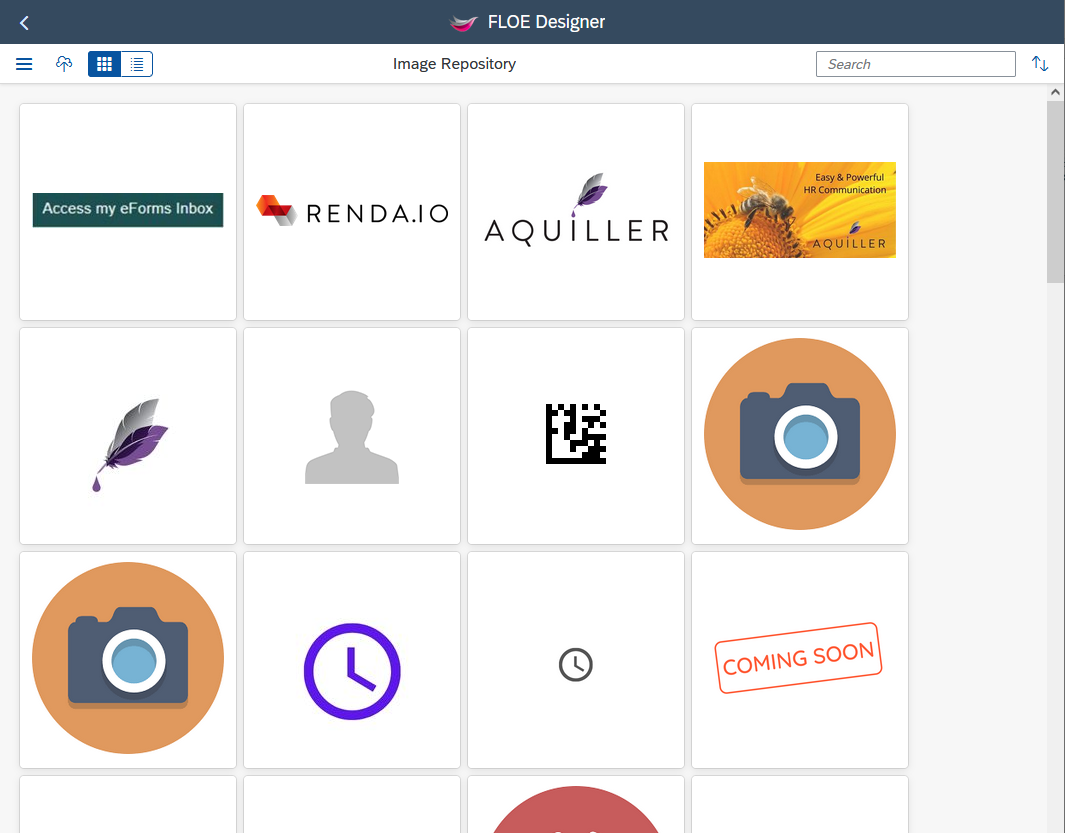
Image Repository
Images can be uploaded to the image repository and added to content directly in the "Edit Email" page (watch the following video for an example). In the "Image Repository" page all images uploaded to the image repository are displayed. Here users can see meta-data regarding the uloaded images and can edit or delete them as well as upload new ones. Users must have the "Extended Maintenance" authorization to navigate to and use the "Image Repository" page.
SMS
Floe can be configured to deliver an SMS message.
Select Create new email type and set the SMS toggle on. Note that Renda.io must be setup before an SMS email type can be created. SMS message types are identified on the Select Email Type screen.

Drag and Drop an SMS block into the content area.
Type text in the content block. Click on the {X} to select and add variables to the content. Add your own variables enclosed in & as required.
