Here's how to get started with Floe
1. Complete the Installation
Follow the steps in the installation guide, making sure you select the correct deployment model (LaunchPad/Direct/Hub/Cloud).
Add the Floe developer role to your user.
2. Add in API keys
You should have been given an API key for the Floe Image Repository. This should be added in the System Settings configuration.
If you require PDF generation then you will need to register at renda.io for a Renda PDF API key. Find your licence key in the Renda.io Developer Portal
3. Define one or more Email Categories
Email categories are grouping objects for email types, which can be used in authorisation checks.
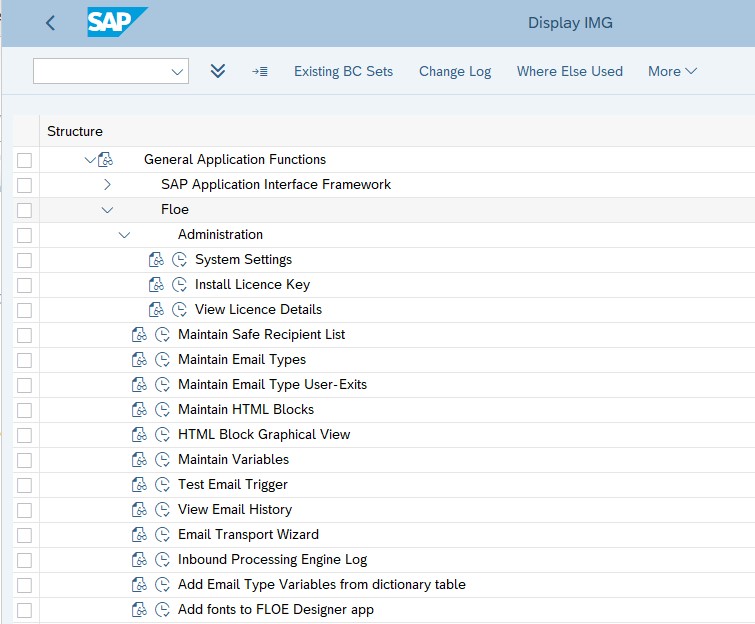
Add an Email Category in the 'Maintain Email Types' configuration menu.
4. Add boilerplate templates if required
Under the option 'HTML Blocks', check what blocks exist with block type 'Template'
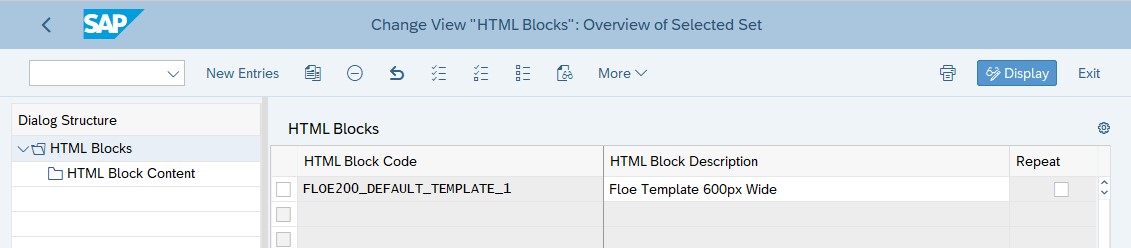
You may require a template with a different width: For example, for HTML output you may want a width of '100%' and for PDF Landscape you may want a width of '794px'
Copy the delivered block, setting a name and description for your new block.
The in the block contents of your new block, replace all references to 600 with your desired width.
The new template will now be available in the Floe Designer app.
5. Use Floe Designer App to build output templates
You now have all the basic configuration that is required, so you can begin creating your templates using the Floe Designer app.
Refer to the User Guide for how to use Floe Designer.
----
Walkthrough: Using Floe for SAP Output
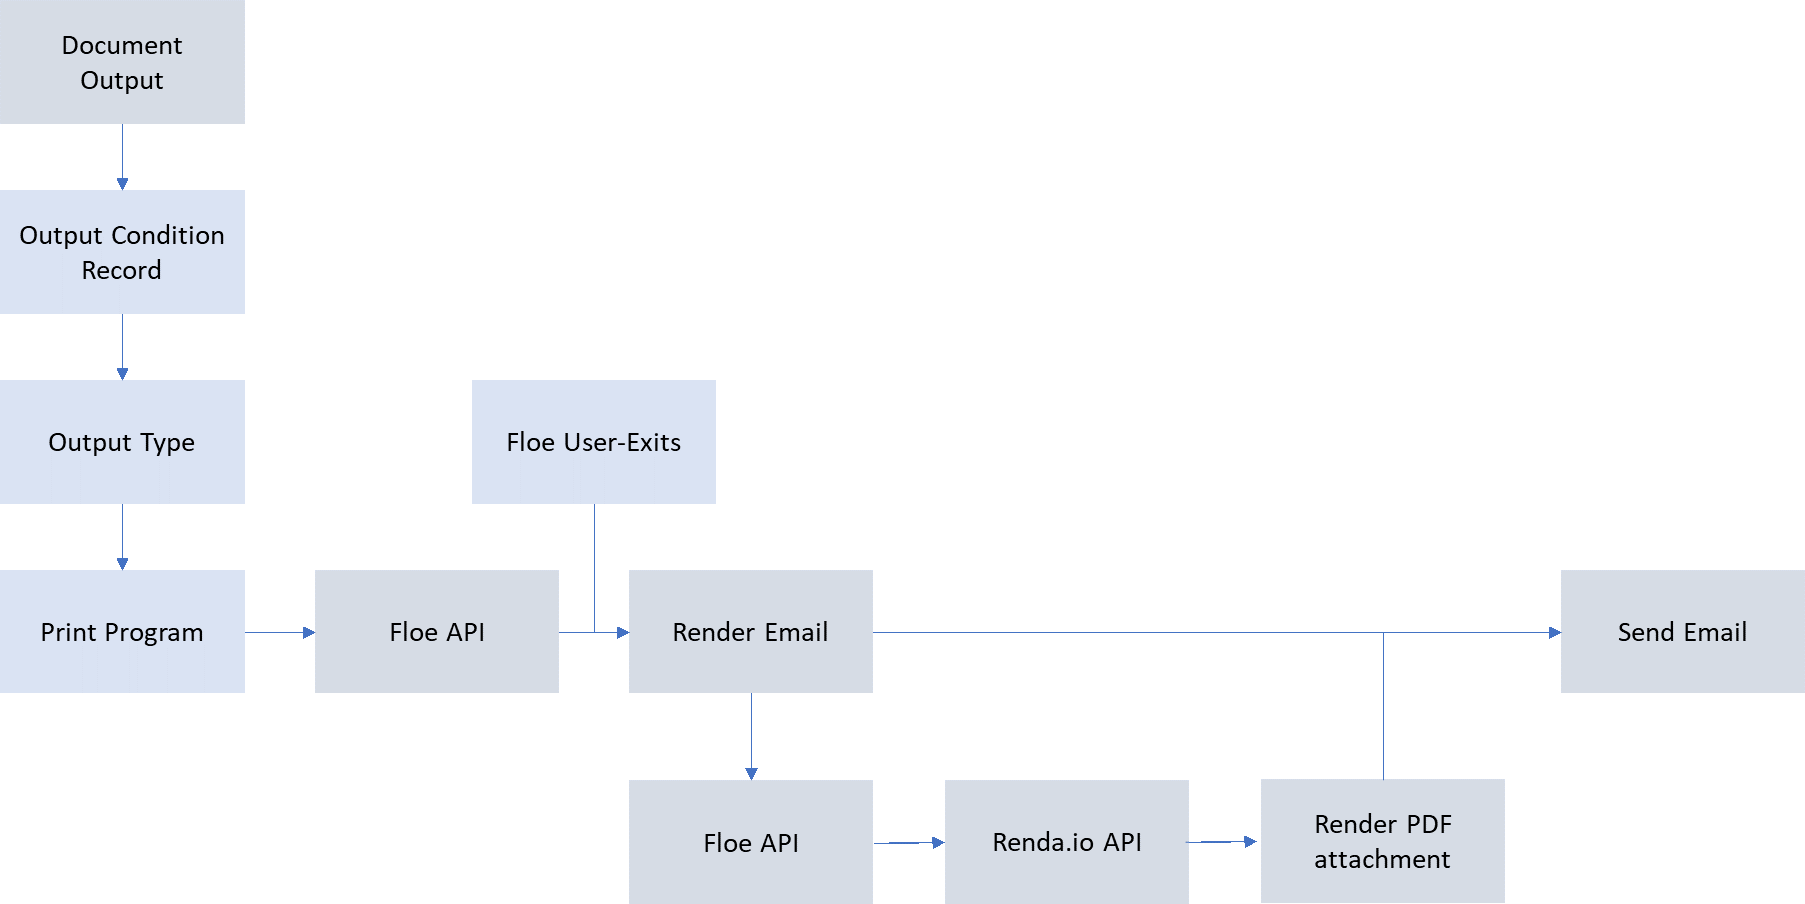
In this example we will use Floe for SAP SD document output. This uses normal output conditions to determine a custom processing program to call the Floe API.
The steps are:
- Use a custom print program to call the Floe API /FLOE/EMAIL_OUT.
- Build the Floe Email Type.
- Add further processing logic as required in Floe User-Exits.
- Configure the SAP Output Type to point at the Floe Email Type.
Floe will render the email and then determine whether a PDF attachment is required. If it is required then it will generate the new output and call Renda.io API to render the PDF document.
Custom Print Program
Copy your print program in use and add in:
i) Floe data declarations
ii) Floe variable data determination in the GET_DATA subroutine
iii) Floe Entry subroutine
iv) Floe Processing subroutine
Sample program is provided: Sales Order Output - Arch Support (arch-global.com)
See also: SAP document output - Arch Support (arch-global.com)
Build the Floe Email Type
i) Generate Floe Variables : Email Variable Generation - Arch Support (arch-global.com)
ii) Use Floe Designer to build the Email.
a. Use left and right margins
b. Use tables to align content horizontally
c. Repeating items can be handled in a table OR in repeating content blocks
d. Copy the email type to a new one for PDF template – use a wider base template (eg 794px instead of 600px)
e. Add PDF settings to PDF output template
f. Add Header and Footer settings to PDF output template
g. Add Dynamic Attachment settings to email output template
Floe User-Exits
You probably only need to use the Data User-Exit.
Add in logic for quantity, value, currency and date field formatting.
See Developer Guide - Arch Support (arch-global.com) under ‘Using Variables’ – or ask for sample code.
For comparison you can install Floe 210 Package for Order Confirmation – this will bring in a sample Email type including the user-exit (See bottom of Developer Guide)
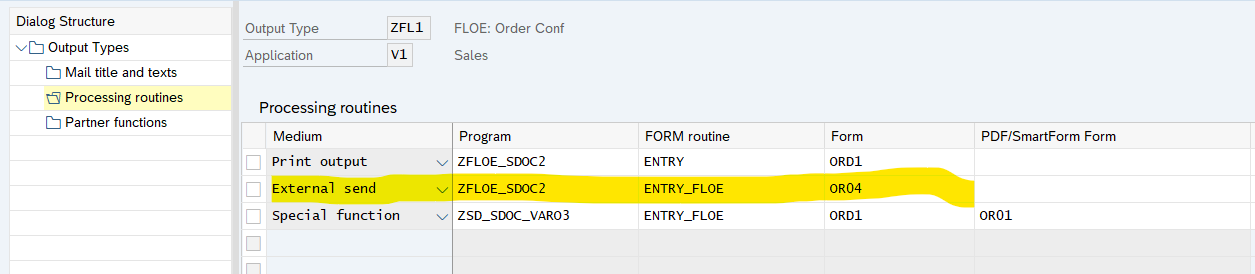
SD Configuration
Set up or extend an output type, and select a medium (Eg External Send) to determine the custom print program. Under ‘Form’ enter the Floe Email Type